Hi there!
Have you noticed that you keep dancing between tabs on your terminal window?
If you happen to do TDD/BDD this can be quite tedious plus you have that feeling of
“I am repeating myself”. Hackers/Programmers/Bakers do not like repeating themselves over and over again ( unless they’re mastering at something ).
Most of my time I use CLI rather GUI, therefore it can be quite painful to open two shell sessions and have to be hitting Alt + F1/ F2 all the time to see the results of my tests.
I also had to be typing :w (save in VimL) all the time to save the feature I am working on.
This tutorial aims to cover Minitest ( Minitest is awesome ). However it can be used for
any other testing framework that are out there. ( RSpec, Bacon, Shoulda, etc…)
Let’s get started. We’re going to use Watchr in order to monitor our files ( i.e every time we save a file watchr runs our test suite for us ). I have had some issues while using
autotest therefore we’re not using it.
However one can use autotest instead of watchr to get this working.
So what do we need?
Assuming you’re using Vim you just need to install GNU/Screen or Tmux and this vim plugin http://www.vim.org/scripts/script.php?script_id=2711 written by Eric Van Dewoestine.( Make sure you say thank you to him. )
A little bit about GNU Screen and Tmux. ( You can read them, I’ll wait. )
GNU/Screen:
http://www.gnu.org/software/screen/
Tmux:
http://tmux.sourceforge.net/
Installation:
Let’s assume you’re using GNU/Linux as your OS, GNU/Screen as your terminal multiplexer, Minitest as your testing framework, and Watchr to automate the process of running tests.
1 – Install GNU/Screen or Tmux
sudo apt-get update
sudo apt-get install screen
2 – Install Vim Screen plugin mentioned above.
Follow the installation instructions on the Vim Screen plugin webpage.
3 – Install autotest , watchr or any other tool to automate your tests.
gem install watchr
gem install minitest
4 – Configure you tests to run automatically.
Here is my watchr script to run my test suite.
( Fiddle with it and use it the way it suits you better )
| #-*- ruby -*- | |
| # | |
| # MAKE SURE YOU CHANGE THE YOUR TESTS DIR | |
| # AND YOUR LIB DIR | |
| # | |
| # Run me with: | |
| # $ watchr specs.watchr | |
| # -------------------------------------------------- | |
| # Rules | |
| # -------------------------------------------------- | |
| watch('^CHANGE_TO_YOUR_TESTS_DIR/.*_spec\.rb') { |m| ruby m[0] } | |
| watch('^CHANGE_TO_YOUR_LIB_DIR/(.*)\.rb') { |m| ruby "CHANGE_TO_YOUR_TESTS_DIR/#{m[1]}_spec.rb" } | |
| watch('^CHANGE_TO_YOUR_TESTS_DIR/minitest_helper\.rb') { ruby tests } | |
| # -------------------------------------------------- | |
| # Signal Handling | |
| # -------------------------------------------------- | |
| Signal.trap('QUIT') { ruby tests } # Ctrl-\ | |
| Signal.trap('INT' ) { abort("\n") } # Ctrl-C | |
| # -------------------------------------------------- | |
| # Helpers | |
| # -------------------------------------------------- | |
| def ruby(*paths) | |
| run "ruby #{gem_opt} -I.:CHANGE_TO_YOUR_LIB_DIR:.:CHANGE_TO_YOUR_TESTS_DIR -e'%w( #{paths.flatten.join(' ')} ).each {|p| require p }'" | |
| end | |
| def tests | |
| Dir['CHANGE_TO_YOUR_TESTS_DIR/**/*_spec.rb'] - ['CHANGE_TO_YOUR_TESTS_DIR/ANY_HELPER_NAME.rb'] | |
| end | |
| def run( cmd ) | |
| puts cmd | |
| system cmd | |
| end | |
| def gem_opt | |
| defined?(Gem) ? "-rubygems" : "" | |
| end |
5 – Create vim key maps
This can be a little intimidating to whomever is new to VimL.
( i.e Vim Language ). I’d rather read these first.
:help i_ctr
:help key-notation
:help map
Here are my vim’s key maps
6 – USE IT && LOVE IT && SHARE IT?
Okay mummy, I hope I made your life a little bit easier.
Remember ABC = Always Be Coding.
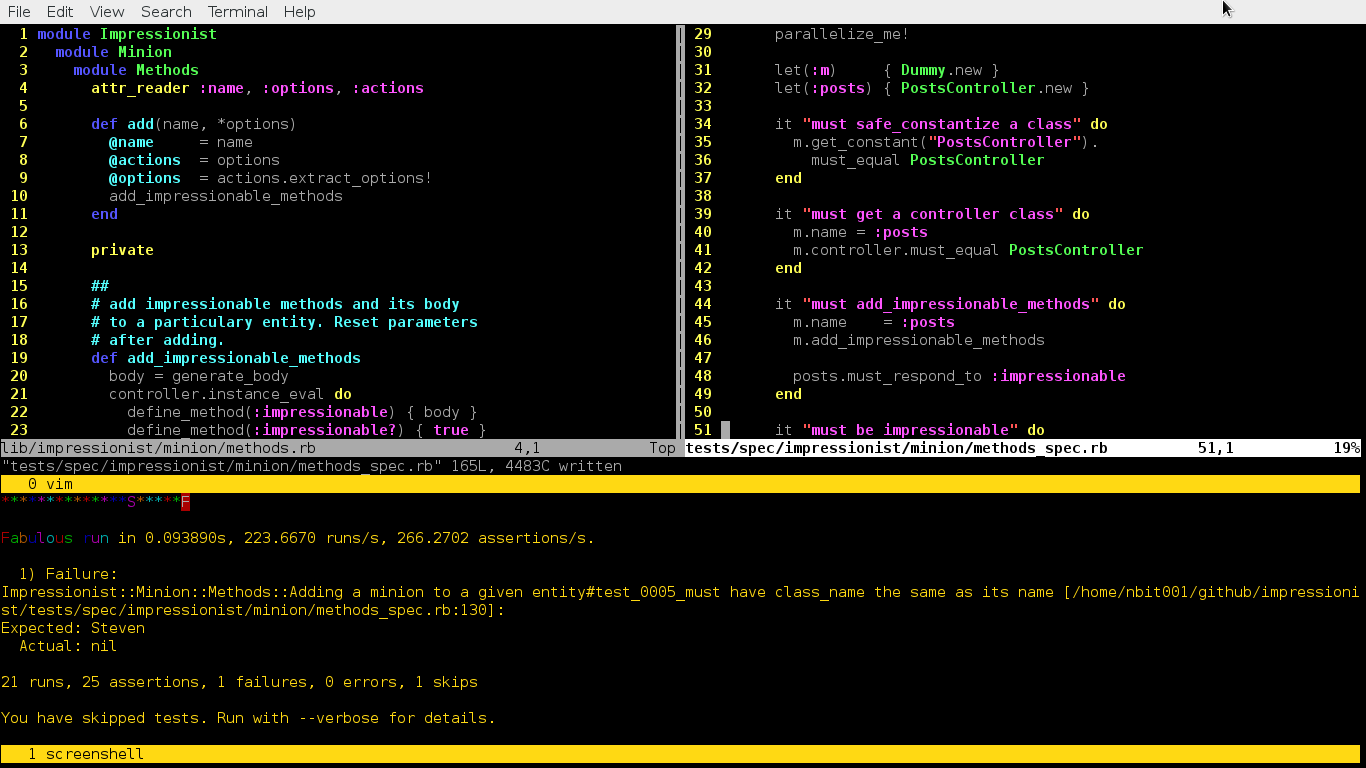
Ahhh, screenshot of the thingy working:
Tcharan: ( BTW that’s on GUI )